
instruction manual for kenmore sewing machine model 385
The Kenmore 385 sewing machine is a reliable workhorse, detailed in its user manual, offering diverse stitch options and user-friendly operation for both beginners and experienced sewers.
This manual provides essential instructions for setup, operation, maintenance, and troubleshooting of model 385, ensuring optimal performance and longevity.
Explore features like adjustable stitch length, thread tension control, and various presser feet, all explained within the comprehensive guide.
Overview of the Model
The Kenmore 385 sewing machine, as detailed in its instruction manual, is a mechanical, zig-zag sewing machine designed for a wide range of sewing projects. It’s known for its durability and straightforward functionality, making it a popular choice for both novice and seasoned sewists.
This model boasts a selection of built-in stitch patterns, including straight, zigzag, and decorative stitches, offering versatility for various fabrics and applications. The manual emphasizes the machine’s ability to handle different materials, from lightweight cotton to heavier denim.
Key features highlighted in the user manual include adjustable stitch length and width, a reliable thread tension system, and compatibility with a variety of presser feet for specialized tasks. It’s a robust machine built for consistent performance.
Key Features and Benefits
The Kenmore 385, according to its instruction manual, offers several key benefits. Its robust mechanical design ensures long-lasting reliability, while the variety of built-in stitches caters to diverse sewing needs. Adjusting stitch length and width provides customization for different fabrics and techniques.
A significant benefit is the ease of use, detailed in the manual, making it ideal for beginners. The adjustable thread tension ensures consistent stitch quality, preventing puckering or loose seams. Compatibility with various presser feet expands its functionality.
The manual highlights its ability to handle multiple fabric types, offering versatility for garment making, quilting, and home décor projects. It’s a cost-effective and dependable machine.
Setting Up Your Machine
The Kenmore 385 instruction manual guides users through initial setup, including unboxing, connecting the power cord and foot pedal, and preparing for first use.
Proper setup ensures optimal performance and safety.
Unboxing and Initial Inspection
Carefully unpack your Kenmore 385 sewing machine, referencing the instruction manual’s included parts list to verify all components are present. Inspect the machine for any visible damage incurred during shipping – note any dents, scratches, or broken parts immediately.
Remove all packing materials, including foam inserts and protective coverings. Retain the original packaging for potential future transport or warranty claims. Confirm the presence of standard presser feet, bobbin types, and other included accessories as detailed in the manual. A thorough initial inspection prevents issues later.
Attaching the Power Cord and Foot Pedal
Consult your Kenmore 385 instruction manual for proper connection procedures. Locate the power jack on the machine’s rear panel and firmly insert the power cord plug. Ensure a secure connection to avoid interruptions during sewing. Next, connect the foot pedal cable to the designated port, typically found near the power jack.
Verify both connections are snug. Do not force the plugs. Before powering on, confirm your electrical outlet matches the machine’s voltage requirements, as outlined in the manual. Proper connection ensures safe and reliable operation.
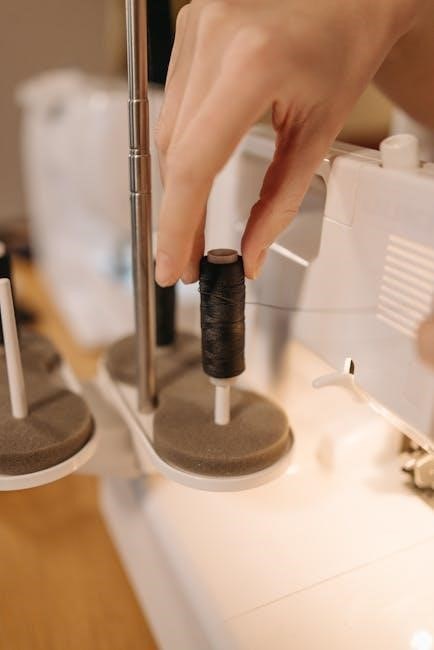
Winding the Bobbin
Refer to your Kenmore 385 sewing machine manual for detailed bobbin winding instructions. Place the thread spool on the spool pin, guiding the thread through the thread guide. Thread the end through the bobbin winder tension disc. Securely attach the empty bobbin to the bobbin winder spindle.
Engage the bobbin winder by pushing the bobbin spindle to the right. Press the foot pedal gently to start winding. Once full, the winder will automatically stop. Remove the bobbin and trim the thread end.
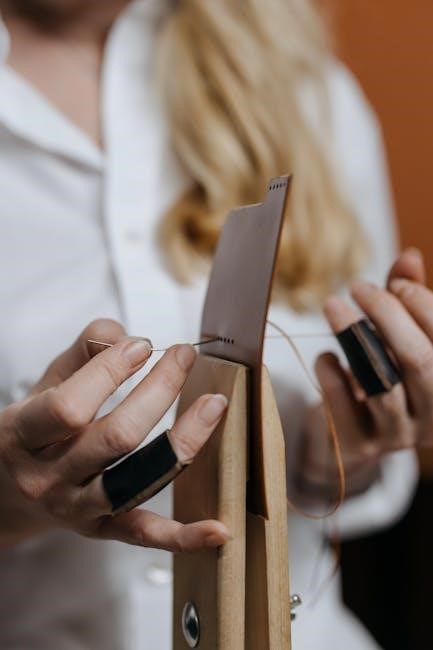
Threading the Upper Thread
Consult your Kenmore 385 sewing machine manual for precise threading diagrams. Begin by raising the presser foot and the needle to its highest position. Place the thread spool on the spool pin, guiding it through the first thread guide. Next, thread down and around the tension discs, ensuring it seats correctly.
Continue threading through the take-up lever and then down to the needle. Finally, thread the needle from front to back. Pull a few inches of thread through the needle eye to begin sewing.
Understanding the Machine Components
The Kenmore 385 features a needle clamp, presser foot, bobbin case, and thread tension dial – all detailed in the manual for optimal sewing performance.
Familiarize yourself with each part’s function to ensure smooth operation and proper maintenance of your sewing machine.
Needle and Needle Clamp
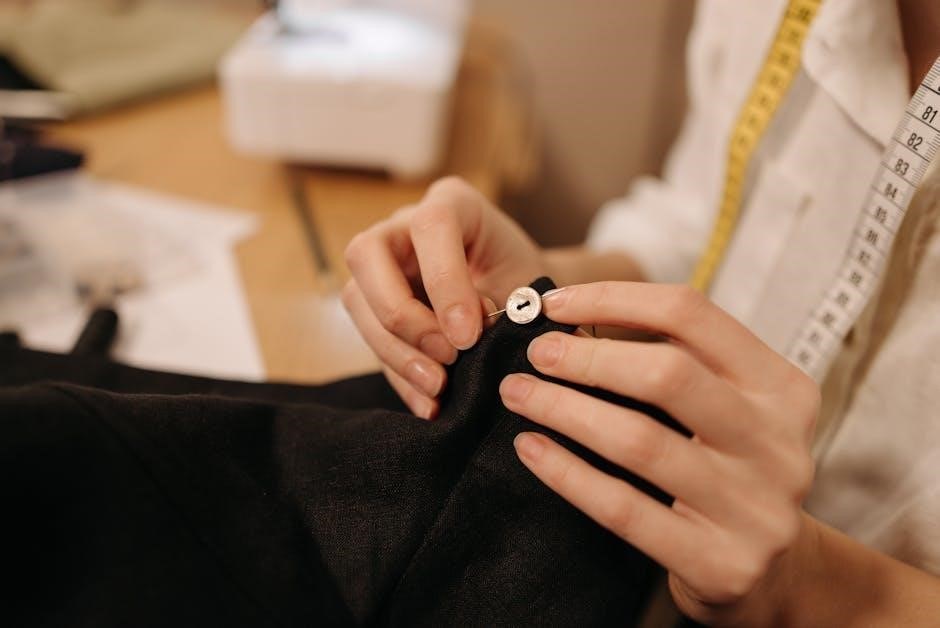
The needle, crucial for stitch formation, must be correctly inserted into the needle clamp, secured tightly to prevent breakage or skipped stitches, as detailed in the Kenmore 385 manual.
Always use the correct needle type and size for your fabric; the manual provides a comprehensive guide. To replace the needle, ensure the machine is off and loosen the screw on the needle clamp.
Insert the flat side of the needle towards the back. Tighten the screw firmly, but avoid over-tightening. A properly secured needle is essential for safe and efficient sewing.
Refer to the manual’s diagrams for visual guidance on needle insertion and clamp operation.
Presser Foot and Shank
The presser foot, attached to the shank, holds the fabric in place during sewing, as explained in the Kenmore 385 manual. Different presser feet are available for specialized tasks like zippers, buttonholes, and decorative stitching.
To change the presser foot, loosen the screw on the shank and gently remove the existing foot. Align the new foot with the shank and tighten the screw securely.
Ensure the foot is properly attached to maintain consistent fabric feed and stitch quality. The manual illustrates various presser foot options and their specific applications.
Regularly check the shank for debris to ensure smooth foot movement.
Bobbin Case and Cover
The bobbin case, detailed in the Kenmore 385 manual, houses the lower thread, crucial for stitch formation. It’s located beneath the needle plate, protected by a bobbin cover. Accessing the bobbin requires sliding or flipping open this cover.
The manual emphasizes proper bobbin insertion – ensuring the thread unwinds correctly. Regularly check the bobbin case for lint and debris, as buildup can cause tension issues and skipped stitches.
Cleaning is easily achieved with the brush accessory. Incorrect bobbin installation or a dirty case are common troubleshooting points addressed in the guide.
Thread Tension Dial
The thread tension dial, as explained in the Kenmore 385 manual, controls the tightness of the upper thread, impacting stitch quality. It’s typically numbered, with higher numbers indicating increased tension.
The manual advises starting with the default setting (usually ‘4’ or ‘5’) and adjusting as needed. Incorrect tension causes looping or puckering. Test stitches on scrap fabric are vital for finding the optimal setting.
Different fabric types and thread weights require tension adjustments. The guide provides a chart for common materials, ensuring balanced stitches.
Basic Sewing Operations
The Kenmore 385 manual details fundamental techniques: selecting stitches, adjusting length/width, starting/stopping, and reverse stitching for secure seams.
Mastering these basics unlocks the machine’s potential for various sewing projects, as outlined in the comprehensive guide.
Selecting Stitch Patterns
The Kenmore 385 sewing machine manual clearly illustrates how to choose from a variety of built-in stitch patterns. A stitch selection dial, prominently featured on the machine, allows users to effortlessly cycle through options.
These include straight stitch for general sewing, zigzag for finishing raw edges and stretch fabrics, and decorative stitches for embellishment. The manual provides diagrams showing each stitch’s appearance and recommended applications.
Refer to the stitch guide within the manual to understand the optimal settings for different fabrics and project types. Proper stitch selection is crucial for achieving professional-looking results.
Adjusting Stitch Length and Width
The Kenmore 385 sewing machine manual details how to fine-tune stitch length and width for customized sewing. Dedicated dials control these parameters, allowing precise adjustments based on fabric type and desired effect.
Shorter stitch lengths are ideal for delicate fabrics and increased durability, while longer lengths are suitable for basting or gathering. Width adjustments impact zigzag stitches, controlling the stitch’s breadth.
The manual includes a chart recommending settings for various applications. Experimenting with these controls is encouraged to achieve optimal results and a professional finish on every project.
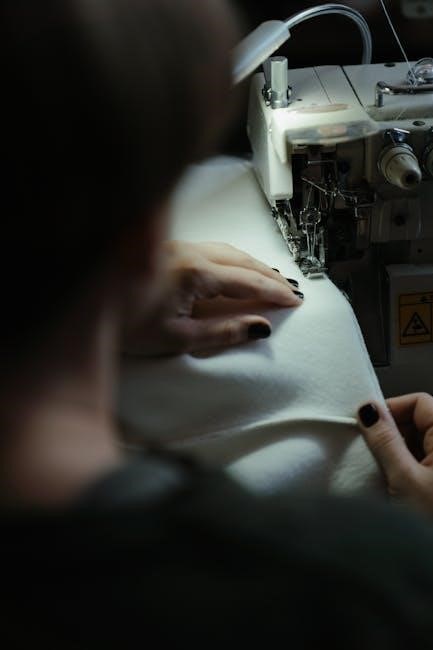
Starting and Stopping Sewing
The Kenmore 385 sewing machine manual emphasizes a controlled start and stop for accurate sewing. Gently depress the foot pedal to begin, maintaining a consistent speed for even stitches. Avoid abrupt starts or stops, which can cause thread breakage or uneven seams.
To stop, lift your foot from the pedal. Always lift the presser foot before pivoting the fabric, preventing damage and ensuring smooth maneuvering.
The manual advises practicing these techniques to develop muscle memory and achieve consistent, professional-looking results with your Kenmore 385.
Reverse Stitching
The Kenmore 385 sewing machine manual details reverse stitching as crucial for securing seams at the beginning and end of a sewing line. Engage the reverse lever or button – typically located near the handle – before starting to sew backwards.
Sew a short distance in reverse, usually 2-3 stitches, then release the lever and continue sewing forward. This creates a secure backstitch, preventing unraveling.
The manual cautions against excessive reverse stitching, as it can weaken the fabric. Practice on scrap fabric to master this technique.

Advanced Sewing Techniques
The Kenmore 385 manual unlocks complex projects! Master zipper insertion, buttonholes, and utilizing specialized presser feet for decorative stitching and advanced fabric handling.
Using Different Presser Feet
The Kenmore 385 manual details a range of presser feet, expanding your sewing capabilities. A standard zig-zag foot handles most fabrics, while a zipper foot facilitates close-stitch zipper applications.
Buttonhole feet ensure precise, consistent buttonholes, and a satin stitch foot creates beautiful decorative effects. The manual illustrates proper foot attachment and optimal settings for each. Explore options like a blind hem foot for invisible hems and a gathering foot for creating ruffles.
Understanding each foot’s purpose, as outlined in the instruction manual, unlocks creative potential and professional-looking results with your Kenmore 385.
Sewing Zippers
The Kenmore 385 sewing machine manual provides detailed guidance on installing zippers, utilizing the specialized zipper foot for precision. Begin by selecting the appropriate zipper foot and attaching it securely. The manual emphasizes using a zipper stitch – typically a zigzag – for flexibility.
It details how to align the zipper teeth with the foot’s guide, ensuring consistent stitching close to the zipper coils. Step-by-step illustrations demonstrate inserting the zipper, stitching along both sides, and finishing the seam.
Refer to the manual for specific settings based on zipper type and fabric weight, achieving professional zipper applications with your Kenmore 385.
Sewing Buttonholes
The Kenmore 385 sewing machine manual dedicates a section to buttonhole creation, highlighting the use of the buttonhole foot. It instructs users to select the appropriate buttonhole setting based on button size, utilizing the measurement guide on the machine.
The manual emphasizes stabilizing the fabric before stitching, often recommending a stabilizer for better results. Detailed diagrams illustrate the four-step buttonhole process: tacking, bar tacking, and finishing.
Precise adjustments to stitch width and length are crucial, as detailed in the manual, ensuring a perfectly sized and durable buttonhole for your Kenmore 385 projects.
Sewing Buttonholes (Step-by-Step)
The Kenmore 385 manual guides users through buttonhole creation in four clear steps. First, attach the buttonhole foot and select the buttonhole stitch. Second, position the fabric and lower the presser foot, initiating the tack stitch.
Third, the manual instructs to carefully guide the fabric as the machine completes the buttonhole sides, stopping at the pivot point. Finally, finish with a reinforcing tack.
The manual stresses testing on scrap fabric and adjusting settings for optimal results, ensuring consistently professional buttonholes with your Kenmore 385.
Maintenance and Troubleshooting
The Kenmore 385 manual details routine cleaning, oiling points, and solutions for common issues like thread jams or skipped stitches, ensuring smooth operation.
Regular upkeep, as outlined, extends the machine’s life and maintains optimal sewing performance.
Cleaning the Machine
The Kenmore 385 manual emphasizes regular cleaning to prevent lint and dust buildup, which can cause malfunctions. Always disconnect the power before cleaning! Use a soft brush, supplied with the machine, to remove lint from the bobbin area, feed dogs, and around the needle plate.
A small vacuum cleaner attachment can also be helpful. Wipe down the exterior with a damp cloth. Never use abrasive cleaners or solvents, as these can damage the machine’s finish. Pay close attention to areas where oil is applied, as dust tends to accumulate there. Consistent cleaning ensures optimal performance and extends the life of your Kenmore 385.
Oiling the Machine
The Kenmore 385 sewing machine manual details specific oiling points to maintain smooth operation. Use only sewing machine oil – never use oil intended for other purposes. Apply a small drop to the bobbin case hinge, the needle bar, and any other points indicated in the manual’s diagrams.
Avoid over-oiling, as excess oil attracts dust. After oiling, run the machine briefly to distribute the oil evenly. Regular oiling, as per the manual’s recommendations, prevents friction and wear, ensuring your Kenmore 385 continues to sew reliably for years to come.
Troubleshooting Common Problems
The Kenmore 385 sewing machine manual offers solutions to frequent issues. Thread bunching? Re-thread the machine, checking the threading path and tension settings. Needle breakage? Ensure the correct needle type is used for the fabric and that it’s properly inserted.
Skipped stitches often indicate a dull or incorrect needle. The manual guides you through diagnosing and resolving these problems. Always unplug the machine before attempting any repairs. If issues persist, consult a qualified sewing machine technician.
Replacing the Needle
The Kenmore 385 sewing machine manual details a simple needle replacement process. First, always power off and unplug the machine. Loosen the needle clamp screw using the screwdriver. Gently remove the old needle, noting its flat side orientation.
Insert a new needle with the flat side facing the back of the machine. Tighten the needle clamp screw securely, but avoid over-tightening. Refer to the manual for the correct needle type for your fabric. A properly installed needle ensures optimal stitch quality.
Stitch Selection Guide
The Kenmore 385 manual showcases stitch options for varied projects. Straight stitches are ideal for seams, zigzag stitches for finishing edges, and decorative stitches add flair!
Straight Stitch Applications
The Kenmore 385’s straight stitch, as detailed in the instruction manual, is your go-to for constructing garment seams, offering strength and durability. It’s perfect for topstitching, creating neat, defined lines on finished projects, and quilting, holding layers securely together.
Use it for basic alterations, hemming pants or skirts, and creating professional-looking closures. The manual emphasizes adjusting stitch length for different fabric weights; shorter for delicate fabrics, longer for heavier materials. Mastering this fundamental stitch unlocks a world of sewing possibilities, from simple repairs to complex designs.
Remember to consult the manual for optimal thread tension settings for various fabrics when utilizing the straight stitch.
Zigzag Stitch Applications
The Kenmore 385’s zigzag stitch, explained in the instruction manual, provides versatility beyond a straight stitch. It’s ideal for finishing raw edges, preventing fabric fraying and creating a professional finish. Utilize it for stretch fabrics, allowing the seam to move with the material without breaking.
The manual details using zigzag for decorative stitching, adding unique embellishments to projects. It’s also crucial for attaching elastic and lace, providing a secure and flexible hold. Adjusting stitch width alters the zigzag’s appearance and strength, as outlined in the guide.
Experiment with different settings for varied effects!
Decorative Stitch Applications
The Kenmore 385’s instruction manual unlocks a world of creativity with its decorative stitch options. These stitches, beyond basic sewing, add unique flair to garments and home décor projects. Explore shell, scallop, and floral patterns for embellishing collars, cuffs, and pillowcases.
The manual guides adjusting stitch width and length to customize designs. Use decorative stitches for monograms, adding personalized touches to gifts or linens. Combine different stitch patterns for layered effects, enhancing visual appeal.
Experimentation is key – let your imagination guide you!

Safety Precautions
The Kenmore 385 manual emphasizes prioritizing safety; always disconnect power before maintenance, keep fingers clear of the needle, and use caution with electrical components.
General Safety Guidelines
Always read the Kenmore 385 instruction manual thoroughly before operating the machine to understand its features and safety requirements. Never leave the machine unattended while it is running. Keep children and pets away from the sewing area. Ensure the machine is placed on a stable, level surface.
Avoid using damaged power cords or plugs. Do not attempt to repair the machine yourself; contact a qualified technician for assistance. Be mindful of moving parts, such as the needle and presser foot, to prevent injuries. Always disconnect the power cord before changing the needle, cleaning, or performing any maintenance.
Never force the fabric under the needle. Use appropriate needles and thread for the fabric type. Exercise caution when handling sharp objects, like scissors and pins. Proper machine operation and adherence to these guidelines will ensure a safe and enjoyable sewing experience.
Electrical Safety
Ensure the Kenmore 385 sewing machine’s voltage matches your household power supply, as detailed in the manual. Never operate the machine with a damaged power cord or plug – replace them immediately. Avoid using extension cords if possible; if necessary, use a heavy-duty cord rated for the machine’s amperage.
Always unplug the machine before cleaning, changing the needle, or performing any maintenance. Do not immerse the machine, foot pedal, or power cord in water or any other liquid. Keep the electrical components dry to prevent shock hazards. Never attempt to disassemble or repair the electrical system yourself.
If the machine malfunctions or exhibits electrical issues, disconnect it immediately and consult a qualified technician. Proper electrical safety practices are crucial for preventing accidents and ensuring safe operation.
Needle Safety
Always disconnect the Kenmore 385 from the power source before changing the needle, as outlined in the manual. Use the correct needle type and size for your fabric to prevent breakage and damage. Insert the needle firmly into the needle clamp, ensuring it’s securely fastened.
Never sew over pins or thick materials that could bend or break the needle. Handle used needles with extreme caution, disposing of them safely in a designated container. Avoid touching the needle during operation to prevent accidental pricks.
Regularly inspect the needle for signs of damage, such as bending or dullness, and replace it as needed. A damaged needle can cause fabric jams and potential injury.
Accessories Included
The Kenmore 385 package includes standard presser feet, assorted bobbin types, seam ripper, screwdriver, and a comprehensive instruction manual for optimal sewing.
Additional accessories may vary, enhancing your sewing experience with specialized tools for diverse projects, as detailed in the manual.
Standard Presser Feet
The Kenmore 385 typically includes several standard presser feet designed for a variety of sewing applications. A zigzag foot is essential for creating decorative stitches and sewing stretch fabrics, offering flexibility in stitch width.
The straight stitch foot provides precision for accurate seams and topstitching, ensuring consistent results. A buttonhole foot simplifies the process of creating perfectly sized buttonholes, guided by the machine’s settings.
Refer to your instruction manual for specific foot attachment instructions and recommended uses. Understanding each foot’s function unlocks the full potential of your Kenmore 385, allowing for diverse and professional-looking sewing projects.
Bobbin Types
The Kenmore 385 sewing machine utilizes a specific type of bobbin for optimal performance, typically a class 15 plastic bobbin. Using the correct bobbin is crucial to prevent issues like thread bunching or inconsistent stitch quality.
Your instruction manual will clearly identify the compatible bobbin type and provide guidance on proper bobbin winding techniques. Avoid using metal bobbins unless specifically recommended, as they may damage the machine.
Always ensure the bobbin is inserted correctly into the bobbin case, following the diagram in the manual, for smooth and reliable sewing operation with your Kenmore 385.
Other Included Accessories
The Kenmore 385 sewing machine package typically includes several helpful accessories beyond the standard presser feet and bobbins. These often include a seam ripper for correcting mistakes, a cleaning brush to maintain the machine’s interior, and a screwdriver for basic adjustments.
Your instruction manual details each accessory’s purpose and proper usage. Additional items may include a quilting guide, assorted needles, and a dust cover to protect your machine when not in use.
Refer to the accessory list in the manual to confirm all included items and familiarize yourself with their functions for a complete sewing experience with your Kenmore 385.
Finding Additional Resources
Kenmore’s support website and online sewing communities offer valuable assistance. Instructional videos can supplement your manual, providing visual guidance for your Kenmore 385.
Kenmore Support Website
Kenmore’s official website is a primary resource for your 385 sewing machine. You can often find downloadable versions of the instruction manual, should you misplace the original.
The website frequently hosts a FAQ section addressing common user questions and troubleshooting tips specifically for Kenmore models. Look for dedicated support pages offering diagrams and detailed explanations of machine functions.
Furthermore, Kenmore may provide contact information for their customer service team, allowing you to directly request assistance with any issues you encounter while using your machine. Check for warranty information as well!
Online Sewing Communities
Online sewing forums and groups are invaluable resources when navigating your Kenmore 385. Many experienced users share tips, tricks, and solutions to common problems encountered with this model.
These communities often host digitized versions of the instruction manual, alongside user-created tutorials and videos demonstrating specific techniques. You can ask questions directly and receive personalized guidance from fellow sewing enthusiasts.
Platforms like Facebook groups and dedicated sewing forums provide a supportive environment to learn and troubleshoot, supplementing the official Kenmore documentation.
Instructional Videos
Visual learners will benefit greatly from the abundance of instructional videos available online, complementing the Kenmore 385’s manual. These videos demonstrate threading, bobbin winding, stitch selection, and more, offering a clear, step-by-step guide.
YouTube channels dedicated to sewing often feature tutorials specifically for vintage Kenmore machines, addressing common issues and advanced techniques. Searching for “Kenmore 385 tutorial” yields numerous helpful results.
These videos can clarify complex procedures outlined in the instruction manual, making it easier to master your sewing machine.